

 We are experiencing recent outages to the online catalog, PPLD mobile app, and Libby/OverDrive. Click here to learn more.
Image
Take and Makes for this project, for ages 5-12, will be available beginning Friday, Feb. 11, 2022. Learn about air pressure with this simple experiment! You can also find more step-by-step pictures in the pdf link provided below.
Supplies and Directions:
Materials we provide:
- 2 large straws
- 1 skinny straw
Materials you provide:
- Scissors
- Tape
Directions:
- Use the scissors to cut 2 diamond shaped holes in your skinny straw. Do this by folding the straw in 2 separate places and cutting a triangle. The holes should be in a line on the straw.
- Tape one end of the skinny straw closed so that no air will escape when you blow into it.
- Bend one of the large straws in half and cut a diagonal hole on each side of the straw.
- Squeeze this straw flat and tape the ends closed. The hole should line up with your work surface. If you hold your straw up to look through the holes, the taped ends should be up and down.
- Cut notches in the ends of the large straw. The cut should be at the top of one end and at the bottom of the other.
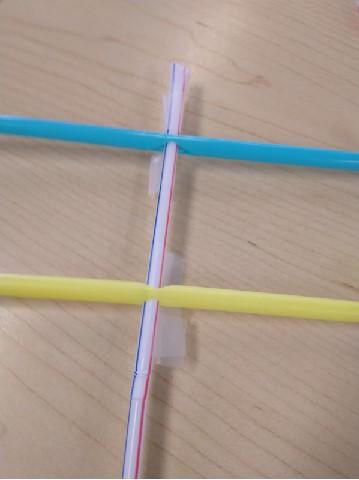
- Slide your skinny straw through the holes in the large straw. You might want to place a piece of tape to keep the straw in place over a hole in the skinny straw while still allowing it to rotate freely.
- Repeat the process with the other large straw.
- Blow into the open end of the skinny straw and watch things twirl. If your straws don’t twirl freely, you might need to adjust the size of the holes.
File(s)