


This Science of Flight Take and Make STEM project will be available at area PPLD Libraries starting Nov. 13, 2020 and is intended for ages 5-12.
Watch these projects at: https://youtu.be/6W6ZtLCe1ow?list=PLMEg2Dd0dSFctLfDQxsL5SmuE8zkwQFmu
Materials provided in Take and Make:
- Plain paper
- Paper airplane template (also attached below)
- Rubber bands
- Whirly-gig or a Mars Helicopter, see https://www.jpl.nasa.gov/edu/learn/project/make-a-paper-mars-helicopter/
Materials you provide:
- Tape
- Hole punch (or something else to poke a hole)
- Scissors
The Science of Flight
Four forces of flight not only affect how an airplane flies, but also affect a paper airplane. These forces – lift, thrust, drag, and weight – determine how a plane will fly.
- Lift is the force that keeps the plane in the air. Lift works opposite the weight of the plane.
- Thrust is the force that propels the plane forward.
- Drag acts opposite to the direction of motion. This force is affected by friction and differences in air pressure.
- Weight is the force of gravity. The pull of an object toward the center of the earth.
In today’s Science of Flight activity, we’ll do several activities. Since paper airplanes are subject to the same forces as actual airplanes, think about the forces of flight and experiment to see what helps your plane fly straighter, more accurately, or farther.
Paper Airplanes:
Use the paper to create paper airplanes. See the pdf link below for the template. Which ones fly the farthest? Which has the best aim? How can you adapt them to change their flight? Test them out.
Paper Airplane catapult:
Start by using the template to create a paper airplane. Just fold on the numbers in order, always folding to the inside so you cover the number with the fold. Once your airplane is folded, punch or poke a hole through all layers about 2 inches from the nose of the plane. Push a rubber band through your hole and then put one end of the rubber band through the other and pull gently. Fly the airplane by hooking the rubber band to your thumb or finger, gently pulling back on the airplane, and then letting go of the plane. See how far it will go! Can you aim it?
Whirly-gig:
Take the whirly-gig in your Take and Make or go to the NASA link above to print out a Mars Helicopter template. On the end where the paper is divided in half, fold the halves in opposite directions. On the part that’s divided into thirds, fold the 2 outside parts in on the dotted lines and then fold the bottom up twice. Either toss the Whirly-gig straight up or drop it from a high place and watch it float down. Experiment with it.

Take and Makes for these projects will be available at area PPLD Libraries starting Friday, Nov. 6, 2020. Supplies provided:
- Bottle cap
- “I Voted” sticker
- Blank sticker
- Epoxy sticker
- Circle or square magnet
- Blank business card
- Rectangular magnet
Supplies needed (from home):
- Markers or colored pencils
Watch the “how to” video on PPLD TV: https://youtu.be/GPgX1oKgfNE?list=PLMEg2Dd0dSFctLfDQxsL5SmuE8zkwQFmu
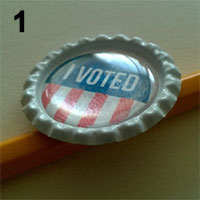
Bottle Cap Magnets:
- Choose if you want to use the “I Voted” sticker or design your own. If you would like to design your own sticker, do so on the blank white sticker (not the clear, thick sticker).
- Peel off one sticker and stick to the inside of the bottle cap.
- Peel off the epoxy sticker (the clear, thick sticker) and place on top of the first sticker inside of the bottle cap. Press down to make sure it is stuck tight.(Avoid touching the back of the sticker as it will leave fingerprints.)
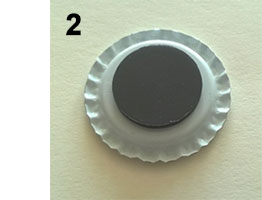
- Peel the adhesive backing off the small round or square magnet. Stick the magnet to the back of the bottle cap.
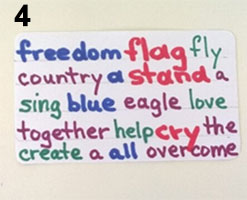
Fridge Magnets
- Decorate the blank business card. You can design it however you want. Some ideas include drawing a mini poster for your favorite fictional character or writing out words on the business card to make magnetic poetry.
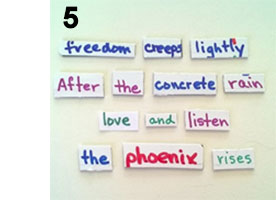
- If you decide to make magnetic poetry, start by drawing 4 light pencil lines on your business card. Then write out election day themed words with colored markers. Be sure to include some articles (a,an,the), some descriptive words, overreactions, and some nouns (like people, animals, places, or things). Your imagination is the limit! (Only decorate one side of the business card).
- Peel off the back of the rectangular magnet and stick it to the back of the decorated business card. You now have a fridge magnet! If you decided to create magnetic poetry, use a pair of scissors to cut out each individual word,then arrange them into funny or meaningful poetry phrases.
Want to share your creations? Tag us on Facebook @ppldteens or @ppldkids.

TAKE AND MAKE: Tween Twist: Dragon Eggs
Pick up your Take and Make supplies at area PPLD libraries starting Friday, Oct. 9, 2020
Supplies:
- Styrofoam egg
- Box of thumbtacks
- Glue
- Toothpick
Optional supplies:
- Sharpie markers, nail polish, or rhinestones
Watch the “how to” video on PPLD TV https://youtu.be/YyPNAoIxy3w
Directions:
- Start the dragon egg at the very bottom of the Styrofoam egg. You can glue this “starter” tack in for stability.
- Insert tacks into the egg so that they overlap the “starter” tack and each other. The tacks overlap like fish scales.
- Keep adding tacks, overlapping them as you move up the egg and cover it with tacks.
- You will put a final tack at the very top. You can also glue this tack to help it stay in.
- You can add glue to any tacks that feel loose or like they might fall out. Use a toothpick to push the glue in where it needs to go.
- If desired, you can use colored sharpies, nail polish, and/or rhinestones to further decorate your egg.