

Categories

Watch this project from a year ago at https://youtu.be/nNIaTK7sFgA?list=PLMEg2Dd0dSFctLfDQxsL5SmuE8zkwQFmu
Supplies and Directions:
Supplies:
- A bendy pencil or a straight one will do
- Feathers
- A Mad Lib (there is a Mad Lib example seen on the video link above, or make up your own)
- Glue (preferably a liquid glue like Elmer's)
- Pencil sharpener
Directions:
- Glue your feathers to the erasure side of the pencil.
- Add a little pressure to the feathers around the pencil. This will help keep them in place.
- Wait for the glue to dry
- Use your Truffula Tree pencil to create a silly story using the Mad Lib! Try not to read the story until you've filled out all the blank spaces. You might need help from a grownup with this.
Native American Beading culture crosses many tribes and has significant meaning in who we are in our tribes as well as what we believe in within ourselves. Join Ela Diel, a Cherokee native, as she shares with you pieces of her culture. Help keep some native traditions alive through beading art.
- Seed-Beaded Bracelets
In seed-beaded bracelets we’ll cover designs and two different ways to string the beads. Come make something with me that you can wear on any occasion with pride as you make what resonates with your spirit.
- Wed., March 30 at 5 p.m. at Old Colorado City Library
- Thu., April 7 at 5 p.m. at Sand Creek Library
- Sat., April 30 at 2 p.m. at High Prairie Library
- Fri., May 6 at 1 p.m. at Monument Library
- Sat., May 14 at 10:30 a.m. at Cheyenne Mountain Library
- Wed., May 18 at 11 a.m. at Manitou Springs Library
- Thu., May 26 at 5 p.m. at Fountain Library
- Seed-Beaded Rosettes
In seed-beaded rosettes we will learn a way to meditate in beading in the round to make beautiful centerpieces that can be made into centerpieces, wall décor, pendants and more.
- Seed-Beaded Earrings
In seed-beaded earrings we’ll be making beautiful pieces that will compliment any outfit and share our native art with all who admire them.
Community Project
Drop in for open hours helping Maker in Residence Ela Diel create a community-based project in Native American Beadwork!
Ela will guide you on how to contribute beads to a community canvas that will be displayed in the Library in the future.
- Fri., April 8 from 2 to 4 p.m. at Library 21c
- Fri., April 15 from 2 to 4 p.m. at Library 21c
- Fri., April 22 from 2 to 4 p.m. at Library 21c
- Fri., April 29 from 2 to 4 p.m. at Library 21c
- Fri., May 27 from 2 to 4 p.m. at Library 21c
Artist Biography
Hello! I'm Ela. I'm Tsalagi (Cherokee) native. My Tsalagi name is Unega-Waya, which means Happy Wolf. This is my heritage: My grandmother grew up in Appalachia in what is modernly known as North Carolina. My grandmother moved away from the tribe to marry my grandfather, an Irish-American to live in New York where they had four sons. She passed away when I was only two, however my father passed on our culture and traditions, and I have since reconnected with the tribe. I love art and beading is a great way to express art and keep my family's culture alive. I am autistic, so if I don't look you in the eye or stutter a little please forgive me. Outside of that, let's have some fun, bead and celebrate the Tsalagi culture together! A'ho!
Take and Makes for this project, for ages 5-12, will be available beginning Friday, Feb. 11, 2022. Learn about air pressure with this simple experiment! You can also find more step-by-step pictures in the pdf link provided below.
Supplies and Directions:
Materials we provide:
- 2 large straws
- 1 skinny straw
Materials you provide:
- Scissors
- Tape
Directions:
- Use the scissors to cut 2 diamond shaped holes in your skinny straw. Do this by folding the straw in 2 separate places and cutting a triangle. The holes should be in a line on the straw.
- Tape one end of the skinny straw closed so that no air will escape when you blow into it.
- Bend one of the large straws in half and cut a diagonal hole on each side of the straw.
- Squeeze this straw flat and tape the ends closed. The hole should line up with your work surface. If you hold your straw up to look through the holes, the taped ends should be up and down.
- Cut notches in the ends of the large straw. The cut should be at the top of one end and at the bottom of the other.
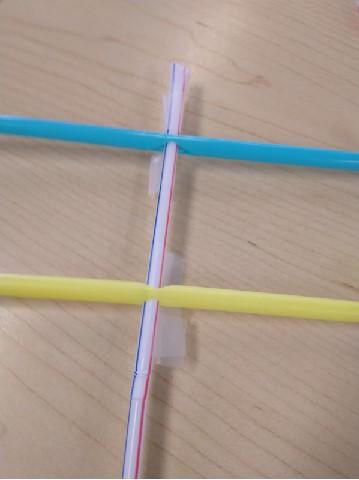
- Slide your skinny straw through the holes in the large straw. You might want to place a piece of tape to keep the straw in place over a hole in the skinny straw while still allowing it to rotate freely.
- Repeat the process with the other large straw.
- Blow into the open end of the skinny straw and watch things twirl. If your straws don’t twirl freely, you might need to adjust the size of the holes.