

 Ruth Holley Library will be temporarily closed for approximately one week starting Mon., Dec. 2 to complete roof repairs.
Categories

Outdoor concerts return to Pikes Peak Library District this summer with three no-cost concerts! Bring your lawn chairs or blankets and join us at the Palmer Lake Village Green (66 Lower Glenway Street, next to Palmer Lake Library) for sunshine and music at the end of the summer. You’ll hear a variety of music, from big band to folk, and beyond. Everyone is welcome to attend these no-cost concerts.
The concerts are from 6 – 7 p.m. In the event of adverse weather, the concerts may be relocated to the Town Hall building adjacent to the Village Green or may be cancelled.
- The first concert on Fri., Aug. 23 features jazz and big band music by Academy Jazz Ensemble.
- The next concert will take place on Fri., Aug. 30 and feature folk music by Tender Foot Bluegrass.
- This year’s series will conclude on Fri., Sept. 6 with a performance by two-time Kerrville New Folk Finalist and Posi Award Winner Jeremy Facknitz (with David Siegel).

Pikes Peak Library District (PPLD) wants to help you connect with your community. We are better together, and with summer in full swing, now's the perfect time to make it happen! Whether you're hanging out on your block or exploring your neighborhood, there are countless opportunities to connect.
Explore the Better Together Booklist
Interested in hosting a potluck or organizing a fun community event? Or maybe you just want to have a cozy chat with your neighbors? We've handpicked a selection of books for all ages covering a wide range of topics to help you make connections. Explore the innate need for human interaction, how interaction can combat loneliness and isolation, and the ways it can improve your health and quality of life. Each of us plays a role in building our community, and these reads offer some great ways to get involved.
This reading list offers lots of inspiration to get you started. You can access eBooks and eAudiobooks for many of the titles through the Libby app or find physical copies at your favorite Library location.
Download the accessible version of the booklist here
Items to Support Your Next Outstanding Gathering
Because our communities are better together, we are sharing some unique ways PPLD can help you connect with your neighbors and friends!
Games anyone?
No outdoor social gathering with neighbors is complete without lawn games like cornhole, horseshoes, or badminton. Instead of buying a game that will take up space in your storage area, consider borrowing a lawn game from our collection, located at Library 21c. Find them on the lower level, near the center staircase. Lawn games check out for a week.
We also have a collection of board games at multiple Library locations.
Ready to read?
Take a chance and organize a book club with a few of your neighbors or arrange a more relaxed gathering with friends. Our Book Club Kits have everything you need to form your own book club. Select from more than 200 titles and check out a kit with 12 copies of your chosen title so everyone can dive right in without having to hunt for or purchase the book.
Not ready to start a book club? You can join one of ours! Find a listing of book clubs at your nearest Library location and find out how to get started on our Book Clubs page.
Need a place to gather?
Finding a spacious place to gather with your neighbors can be challenging. Look no further than your local Library. You can reserve a meeting room or event space to host all sorts of gatherings. Whether you're brushing up on a new language, kicking off a knitting circle, enjoying some card or board games, or finally starting that book club you've been dreaming of since reading the above section, we have space that suits your needs. We also have event spaces you can reserve for larger events and productions.
Ready to explore together?
Engaging with others can happen anywhere, including during events at the Library. PPLD has classes and programming for all ages and interests where you can spend time exploring and learning alongside your community. Whether you want to experience new forms of creativity in one of our makerspaces, join a yoga class, brush up on your computer skills, or just get out of the house, we have something for everyone. Check out our program calendar to see offerings at each of our Library locations.
Hosting a gathering this summer?
Join your fellow neighbors throughout the community who are hosting neighborhood gatherings this summer as part of the City of Colorado Springs’ 1,000 Neighborhood Gatherings initiative. For more information and resources, or to add your gathering to the map, visit 1,000 Neighborhood Gatherings.

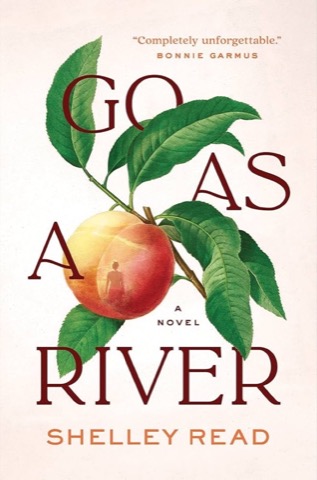
Pikes Peak Library District is pleased to announce the selected title for All Pikes Peak Reads (APPR) 2024. This year’s book is Go as a River by Shelley Read. (You can also access on OverDrive/Libby)
All Pikes Peak Reads is Pikes Peak Library District’s (PPLD) annual community reads program that focuses on celebrating literature, improving community connections, and fostering dialogue across social, cultural, and generational lines. Each year, we select APPR titles that focus on timely topics and plan a variety of community-wide programs. This year’s selection is a historical fiction book set in the former Colorado town of Iola that takes readers on a literary journey that is equal parts hopeful and tragic while encouraging readers to rethink their definition of home and family.
Hosting a book group? Check out the book discussion guide from the publisher.
Author visit
Join Pikes Peak Library District as we welcome Shelley Read to discuss her book Go as a River, the 2024 All Pikes Peak Reads selection.
Following the keynote address, Shelley will do an audience Q&A session and will be available for book signing. Books will be available to purchase during the event. Registration is suggested, but not required.
When: Sat., Oct. 5 at 10:30 a.m. Registration and more information
Sat., Oct. 5 at 3 p.m. Registration and more information – FULL
Location: Library 21c
Additional Programs
- Beneath Blue Mesa: Author Talk
Join Pikes Peak Library District as we welcome author David Primus to discuss his book Beneath Blue Mesa: The Gunnison River Valley Before the Reservoir. David will present a slideshow of the history of the Gunnison River Valley before Blue Mesa Reservoir was completed in 1965. He will discuss fishing resorts, ranches, towns, and the narrow-gauge railroad that now lie beneath the reservoir as remembered by local residents. Copies of the book will be for sale after the program. -
Introduction to Canning: Water Bath Canning
From preserving your garden harvest to putting up locally purchased produce, canning is a great way to preserve the season’s bounty. Home canning requires knowledge of the science behind food preservation. In this introductory class, participants will learn about the risk of botulism, an overview of proper techniques, and a review of the proper tools for canning.After attending this class, you will be able to safely can high acidic foods such as fruit, peaches, salsa, pickles, tomatoes, jams, jellies, and more. Presented by El Paso County CSU Extension.
- Peach Cobbler: A Hands-On Nostalgic Experience
Join us to create and sample nostalgic peach cobbler, inspired by the 2024 All Pikes Peaks Read selection, Go as a River. Presented by award-winning author Elayne Prechtel from @sharinglifeloveandfood, this "make and take" class celebrates food, community, and storytelling. Don't miss this special hands-on event artfully blending culinary and literary arts.
Further Reading
Take a deeper dive into Go As a River with BookBrowse, brought to you by the Friends of PPLD. Sign in with your library card to access a list of themes, the article “A Brief History of the Peach,” book reviews, recommended reads, and more.
Learn More about Iola and the Blue Mesa Reservoir
- Drought reveals a long-submerged Colorado town on floor of Blue Mesa Reservoir, from the Denver Post
- As The Blue Mesa Reservoir Dries Out, A Forgotten Small Town Reemerges, from Colorado Public Radio
Book Clubs
Several of our book clubs will be reading Go as a River together. Check our Book Clubs page to find out which clubs are reading it. Anyone can join our book clubs at any time, even if you have not been part of the group before. We are always happy to welcome new readers who want to have fun discussing books with others in their community.
More about Go as a River
From the publisher:
Seventeen-year-old Victoria Nash runs the household on her family’s peach farm in the small ranch town of Iola, Colorado—the sole surviving female in a family of troubled men. Wilson Moon is a young drifter with a mysterious past, displaced from his tribal land and determined to live as he chooses.
Victoria encounters Wil by chance on a street corner, a meeting that profoundly alters both of their young lives, unknowingly igniting as much passion as danger. When tragedy strikes, Victoria leaves the only life she has ever known. She flees into the surrounding mountains where she struggles to survive in the wilderness with no clear notion of what her future will bring. As the seasons change, she also charts the changes in herself, finding in the beautiful but harsh landscape the meaning and strength to move forward and rebuild all that she has lost, even as the Gunnison River threatens to submerge her homeland—its ranches, farms, and the beloved peach orchard that has been in her family for generations.
Inspired by true events surrounding the destruction of the town of Iola in the 1960s, Go as a River is a story of deeply held love in the face of hardship and loss, but also of finding courage, resilience, friendship, and, finally, home—where least expected. This stunning debut explores what it means to lead your life as if it were a river—gathering and flowing, finding a way forward even when a river is dammed.
About the Author
Shelley Read’s internationally bestselling debut novel, Go as a River, is being translated into over thirty languages and has been optioned for film by Mazur Kaplan in partnership with Fifth Season. She was a Senior Lecturer at Western Colorado University for nearly three decades, where she was a founder of the Environment & Sustainability major and the PRIME program for at-risk students. She holds degrees in writing and literary studies from the University of Denver and Temple University and is a regular contributor to Crested Butte Magazine and Gunnison Valley Journal. She is a fifth-generation Coloradoan who lives with her family in the Elk Mountains of the Western Slope.